Home Decor
Illuminate Your Space: DIY Candle Crafting Guide
If you’re establishing your own candle-making business, deciding what kind of candles to produce and sell is one of the most enjoyable—and often difficult—parts of the process. There are numerous scents, waxes, and decorations (think: pressed flowers) to pick from, and the procedure may call for a lot of brainstorming and creative energy.
However, creating candles at home may be quite simple if you plan ahead of time and apply the proper tools—and your candle-loving consumers will love to have your creations as essential additions to their home décor.
DIY Candle Crafting Materials

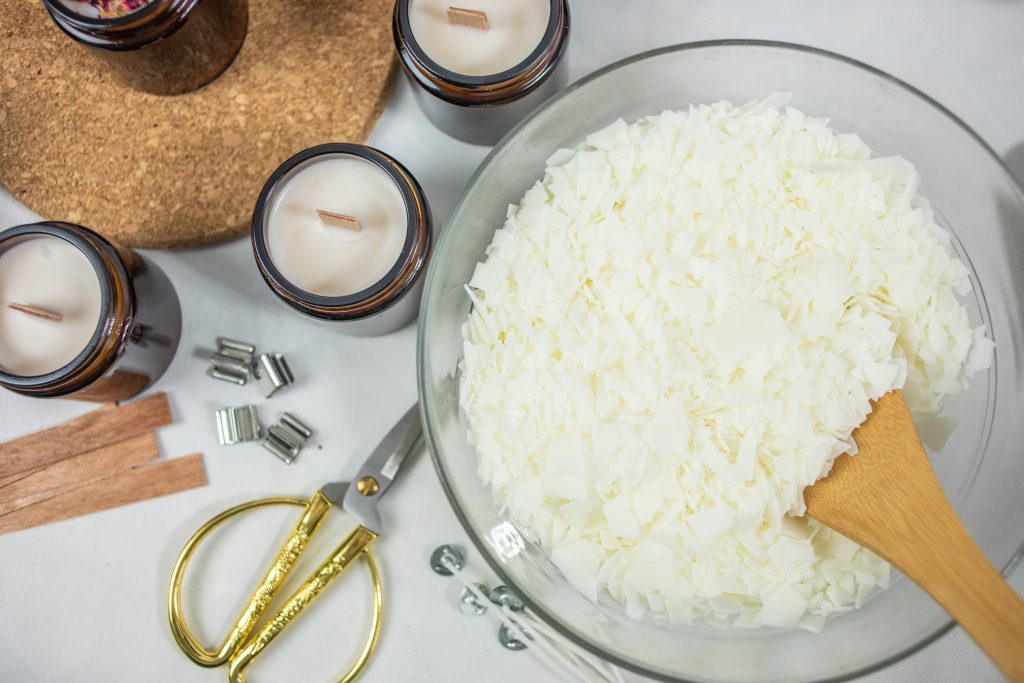
1. Wax
There are several types of candle wax available, each with its own characteristics and benefits, and here are the three most commonly used:
Paraffin wax: This is one of the most common types of candle wax. It’s derived from petroleum and is known for its excellent scent throw and ability to hold colour well. Paraffin wax candles tend to have a longer burn time but may produce more soot than other types.
Soy wax: Made from soybean oil, soy wax is a natural and renewable alternative to paraffin wax. It burns cleanly and slowly, with minimal soot. Soy wax also has excellent scent throw and can hold fragrance oils well.
Beeswax: Beeswax is a natural wax produced by honeybees. It has a sweet, honey-like aroma and burns cleanly with a warm, natural glow. Beeswax candles tend to have a longer burn time and emit negative ions, which can help purify the air.
2. Wicks
In addition to the wax, the pro-grade candle making wick is most essential element for creating a unique candle burning experience. It’s a crafting material, typically made of cotton or other materials like wood, and serves to draw up the melted wax to fuel the flame. Wicks come in various sizes and shapes, each suited to different candle types and sizes. Choosing the right wick ensures an even burn and proper scent throw.
There are several types of candle making wick available, each suited to different candle types and purposes:
- Cotton wicks: These are the most common and versatile. They come in various sizes and are suitable for most candle types.
- Wooden wicks: These candle wicks provide a unique aesthetic and crackling sound reminiscent of a fireplace. They’re often used in container candles and can be combined with other wick materials for added functionality.
- Core wicks: These have a metal or paper core surrounded by cotton, providing stability and rigidity. They’re commonly used in pillar candles and container candles.
- Zinc or tin core wicks: These have a metal core for added strength and are suitable for large or heavily scented candles.
- Hemp candle wicks: Made from natural hemp fibres, these wicks offer a clean burn and are often used in eco-friendly or organic candles.
3. Fragrance oils
Scented candles acquire their scent from essential oils or fragrance oils that are mixed into the melted wax during the candle-making process.
4. Spatula
A heat-proof spatula is a must-have tool for swirling wax that will result in an equal melt and great-looking candles.
5. Heat-proof container
Mason jars, glass jars, and even tin cans are ideal candle carriers. This is the part where you let your creativity take the lead!
6. Double boilers
Double boilers are culinary appliances that uniformly spread stovetop heat for controlled warming, making them ideal for melting wax. You can use a pre-made double boiler or create one by stacking a metal bowl on top of a pot with a tiny amount of water in the bottom.
7. Thermometer
To determine the temperature of your wax, use a candy thermometer, a digital infrared thermometer, or a deep fry thermometer. It’s an essential tool for determining when to move on to the next step of the process.
8. Popsicle stick or pencil
Popsicle sticks, pencils, chopsticks, or other lightweight, straight objects will help to stabilise the candle wick while it cures.
Basic Rundown of the Candle-Making Process

- Choose your wax: There are several types of wax suitable for candle making, including soy wax, beeswax, paraffin wax, and coconut wax. Each has its own characteristics, so choose based on your preferences and needs.
- Melt the wax: Use a double boiler or a wax melting pitcher to melt the wax. Heat it gently and stir occasionally until completely melted.
- Add fragrance: If desired, add candle fragrance oil or essential oils to the melted wax. Be sure to follow recommended usage rates for safe and effective scent throw.
- Add colour: If you want coloured candles, you can add candle dye or crayons to the melted wax. Stir well to ensure the colour is evenly distributed.
- Prepare the containers: While the wax is melting, prepare your candle containers by placing wicks in them. You can use wick stickers or hot glue to secure the wicks to the bottom of the containers.
- Pour the wax: Once the wax is melted and fragranced, carefully pour it into the prepared containers. Leave some space at the top to allow for proper cooling.
- Cool and cure: Allow the candles to cool and cure completely before trimming the wicks and burning them. This usually takes several hours to overnight, depending on the type of wax used.
- Enjoy your candles: Once the candles are fully cooled and cured, they’re ready to be enjoyed! Light them up and bask in the warm glow and lovely scent of your homemade candles.
DIY candle making allows for creativity and customisation, so feel free to experiment with different waxes, fragrances, colours, and container styles to create candles that suit your personal taste and style.
As a proud Pisces known for the selflessness, Olivia joined up the blog fascinated by the idea she can help readers with info on topics and their related benefits like health and beauty, travel, food and drinks. When not writing, she likes to call it a day reading comic books in the company of her Tonkinese cat Chatty or binge-watching The Big Bang Theory with her SO like the nerd she is.


