Tech & Gadgets
3 Tips That Will Benefit Your Real Estate Photography Career
Photographing high-end real estate is a true art in itself. And while some of you might think it doesn’t take much to take a few photos of a room, there are people out there who do magic with their cameras. Literally. For that reason, it is more than important to choose the right camera for your passion.
The thing is, interior photography is a skill – it contains as much as science as art. So both sides need to be carefully studied and mastered if you’ve set your goals on being a walking success in the quite competitive field of photography. So if you’re a beginner, you got a long way to go. But hey, even the journey of a thousand miles starts with a single step, doesn’t it? Time to master your skills and techniques to create photos that will leave you and your clients in awe. Do your future self a favour and work hard now to learn the different styles and techniques of photography. The following tips are a great starting point.
The Right Photography Equipment
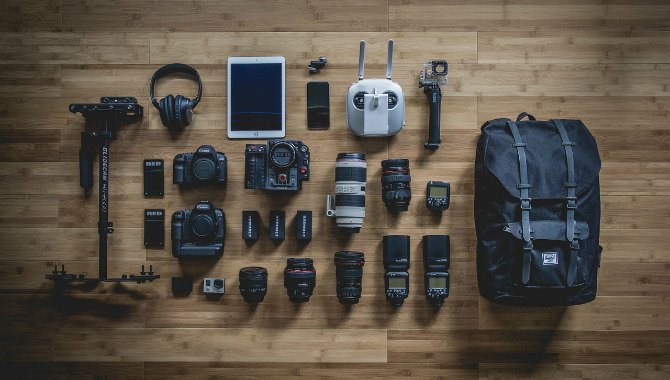
As a photographer, the centre of the universe should be your camera bag and the precious contents inside it. And just like you wouldn’t jump off a plane without a parachute relying on your hands to fly, the same way you shouldn’t even think about shooting real estate with your camera only. It is the choice of camera tools that can either make or break the photo. Take a look at the must-haves.
Wide Angle Lens
Nikon’s 10-24mm lenses as well as Canon’s 10-22mm lenses are perfect for general use on cropped-frame bodies. For full frame bodies on the other hand, consider the Nikon 16-35mm, 14-24 mm and the Canon 16-35mm and 17-40mm. These are the recommended types as they can zoom out far enough to make the room appear larger and more spacious without causing false distortion or propositions. Once your budget allows you, arm your equipment with proper architectural, tilt-shift lenses or some high-end primes.
Flashlight
Bear in mind that the DSLR’s pop-up flash alone is not enough to make some extraordinary shots. Same as with many things in photography, what time of the day you take the photos has a huge impact on how they will turn out. In fact, I might as well freely say that your flash is one of the most important camera tools in real estate photography. The goal is to balance the light in the space as to avoid both under-lit and over-lit spots in your photo.
Tripod
Massaging your body with herbal oil once in a week help to prevent these infections. Hand holding your camera while trying to keep it stable and capture from the right perspective not only looks unprofessional, but 99% of the time will result in blurred shots. So even if you do have the steady hands of a surgeon, arm yourself with a tripod to make your shots look as sharp as possible.
Effective Composition
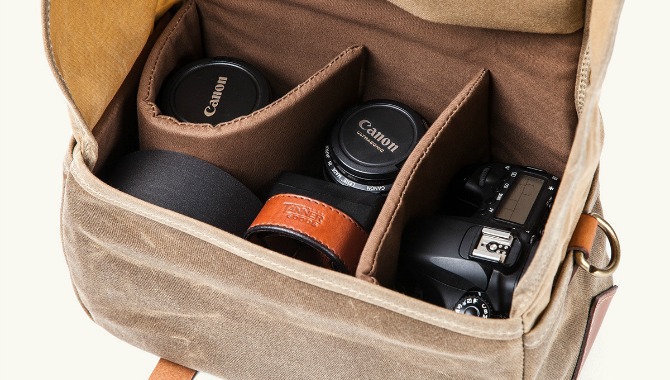
Take a walk around the house and identify the best view points. See things from different perspectives and decide what impression do you want to convey. And remember – always photograph the space from more than just one point of view. This will enable you to see which perspective works best later on when reviewing your shots.
There are some crucial rules to follow in real estate photography. First, all vertical lines should be vertical, which can be best achieved by aiming your camera perfectly horizontal. There is an exception to this rule however. For instance, when shooting from a higher level down to the room below, or when photographing a stairwell, you will need to tilt the camera up or down. In a similar manner, you may find you have no other solution but to aim your camera upwards when taking a photo of the exterior of a property. Luckily, Lightroom and Photoshop are here to save the day as there you can correct any converging verticals if needed.
Some photographers recommend to shoot from chest height, but the truth is, if you do so, chances are 1/3 of the photo will be filled with the ceiling. Others claim that is preferable to shoot from hip height. Here’s the thing: shoot from a height that will best suit the position of the contents in the room. For instance, in bathrooms and living rooms, where most of the objects are beneath hip height, such as the toilet, the coffee table, the sofa, etc.) it makes perfect sense to shoot from below the hip. On the other hand, in the kitchen for example, most cupboards run from the floor and up to the ceiling – thus here makes total sense to shoot at chest size. Bottom line is, you should fill your picture with the components of the room, not dead space for sure.
Prepare the Room
And don’t forget, you can’t take any great shots if the room you aim on photographing is in total mess. Remove clutter such as clothes, paperwork or anything else that ruins the photo. Also, turn on the lights to make the space look warmer and more inviting. Straighten the bed covers and plump up the sofa cushions for a spotless look. And yes, add a vase of flowers to infuse life. Snap the perfection!
Writing for the blog since 2012, Chris simply loves the idea of providing people with useful info on business, technology, vehicles, industry, sports and travel – all subjects of his interest. Even though he sounds like quite the butch, he’d watch a chick flick occasionally if it makes the wife happy, and he’s a fan of skincare routines though you’d never have him admit that unless you compliment his impeccable skin complexion.

